Scheduling an agent or workflow to run automatically
Run a workflow on a cadence with a visual calendar or a cron expression, trigger it on demand, and pause or resume it.
A schedule tells an agent to run a workflow (or a one-off message) automatically at a set time. The Schedules page is a week-at-a-glance calendar of everything your fleet has queued, plus a list view for maintenance. This article covers creating a schedule with the visual picker or a raw cron expression, running one on demand, and pausing, resuming, or deleting schedules, individually or in bulk.
What you can do
- Build a schedule visually by picking days and times, or paste a cron expression.
- See a live preview of the next firings before you save, all in your tenant timezone.
- Run any schedule immediately without waiting for its next slot.
- Pause and resume schedules, one at a time or in bulk from the list view.
- Spot problems early through the Needs attention panel and per-schedule health badges.
Create a schedule
- Go to Work -> Schedules (
/schedules) and click Schedule task. You can also start a schedule already pointed at a specific workflow from the Workflows list card menu (Schedule for agent...). - In the dialog, pick the Agent and choose a Job type: workflow (run a saved workflow) or message (send the agent a one-off prompt). For a workflow job, pick the Workflow; selecting one auto-fills the task name and its suggested cadence.
- Give the schedule a Task name. This is the label you will see on the calendar and in the list.
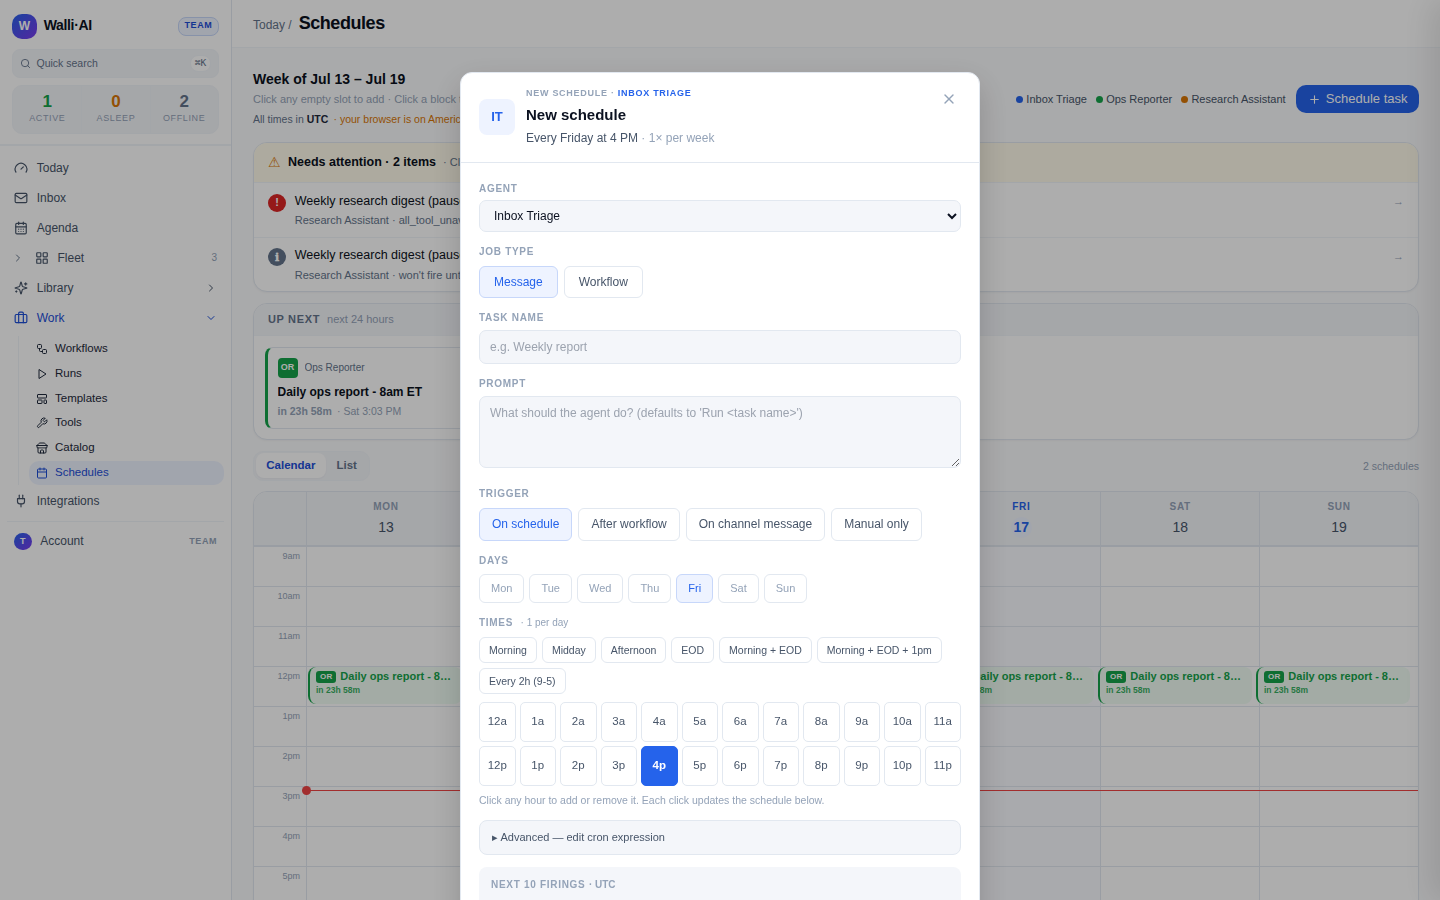
- Choose a Trigger. On schedule fires on a cron cadence and is the default; the other options (After workflow, On channel message, Manual only) are covered in Workflow triggers.
- For a cron trigger, set the timing visually. Toggle the Days (Mon through Sun), then pick Times using the quick presets (Morning, Midday, Afternoon, EOD, and combinations) or by clicking cells in the hour grid. You can select several hours in a day. If you prefer raw cron, open Advanced - edit cron expression and type a five-field expression directly.
- Check the Next 10 firings preview, which lists the upcoming run times in your tenant timezone so you can confirm the cadence before saving.
- Leave Enabled - schedule will fire when due checked, and click Create schedule.
All times shown on this page are in your tenant timezone. If your browser is set to a different zone, the header flags it so you are never surprised by when a job actually fires. You can change the tenant timezone in Settings.
Read the calendar
The default Calendar view shows the current week as a 24-hour grid with today highlighted and a live line marking the current time.
- Each block is an enabled cron schedule, showing the agent initials and the task label, plus an in {time} countdown when it fires within a day.
- A block's left border is color-coded: red means it needs attention (flagged for review or several failures in a row), amber means it has gone stale, and the agent's own color means healthy.
- Click any empty cell to create a schedule prefilled to that day and hour, or click a block to open and edit it. Hovering a block reveals a Run now control.
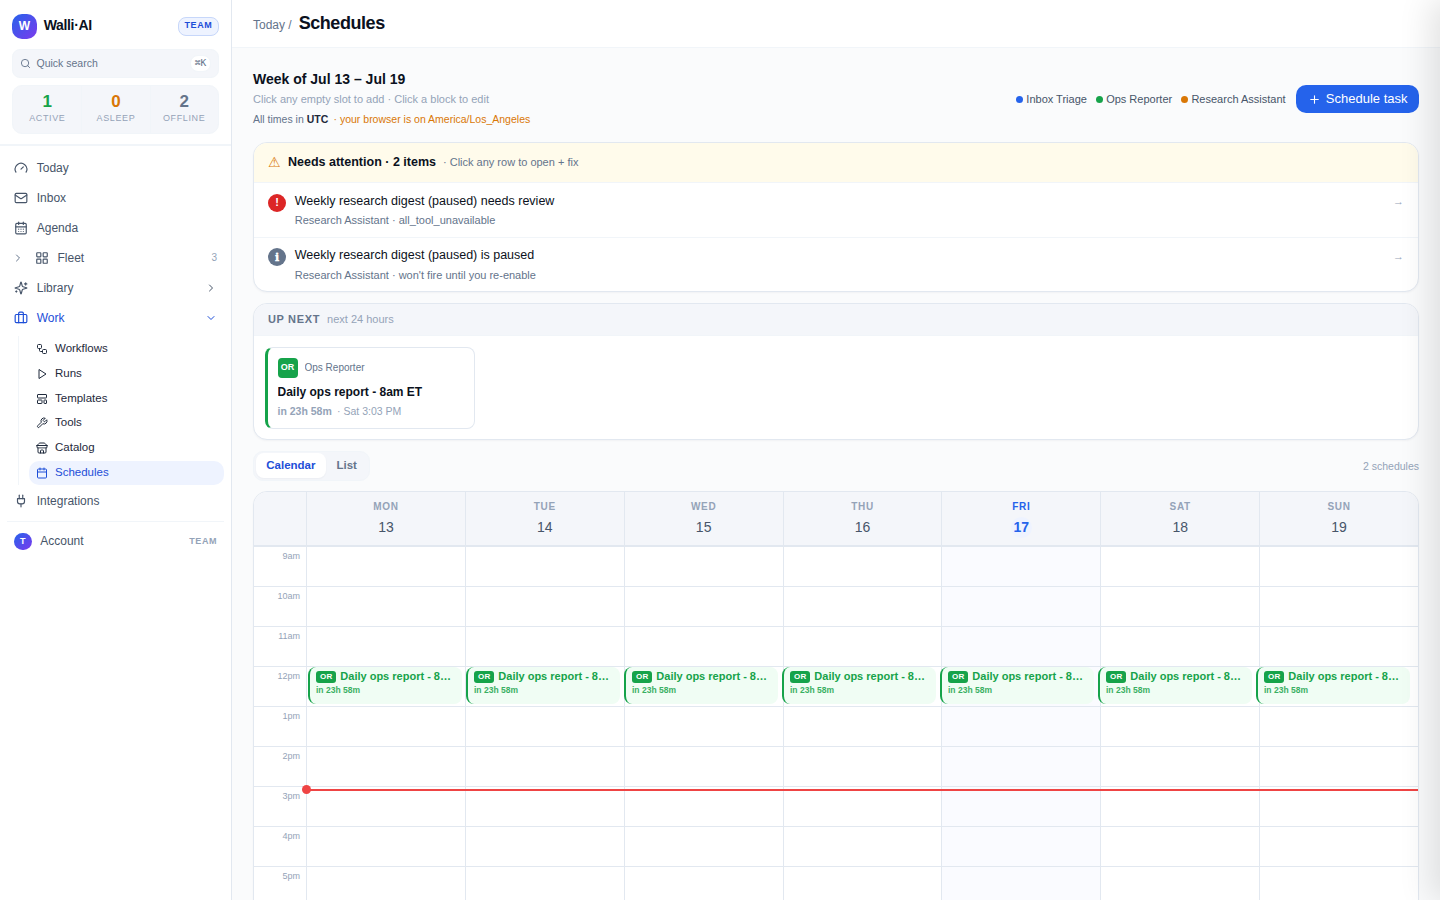
Above the calendar, a Needs attention panel appears whenever the page finds problems: schedules the tuner has flagged for review, schedules that have not fired in over a week, ones with repeated failures, paused schedules, and time-slot conflicts where two schedules on the same agent overlap. Every row is clickable and opens the schedule so you can fix it. An Up next strip shows the next few firings in the coming 24 hours, each with its own Run now button.
Run, pause, resume, and delete
You are never locked into a schedule's cadence.
- Run now. Open a schedule and click Run now (or use the hover control on a calendar block or Up next card) to fire it immediately. The dialog reports the run id it started.
- Pause / resume. In the list view, each row has an inline pause/resume toggle. A paused schedule stops firing until you resume it and shows a Paused badge; the agent, its history, and the workflow all stay intact.
- Bulk actions. Switch to the List view, select rows with their checkboxes, and use the bulk toolbar to Pause, Resume, or Delete several at once. Bulk delete asks you to type
DELETEas a safeguard. - Delete. From inside a schedule, Delete removes it after a confirmation. Past runs stay in the Library; only the schedule itself is removed.
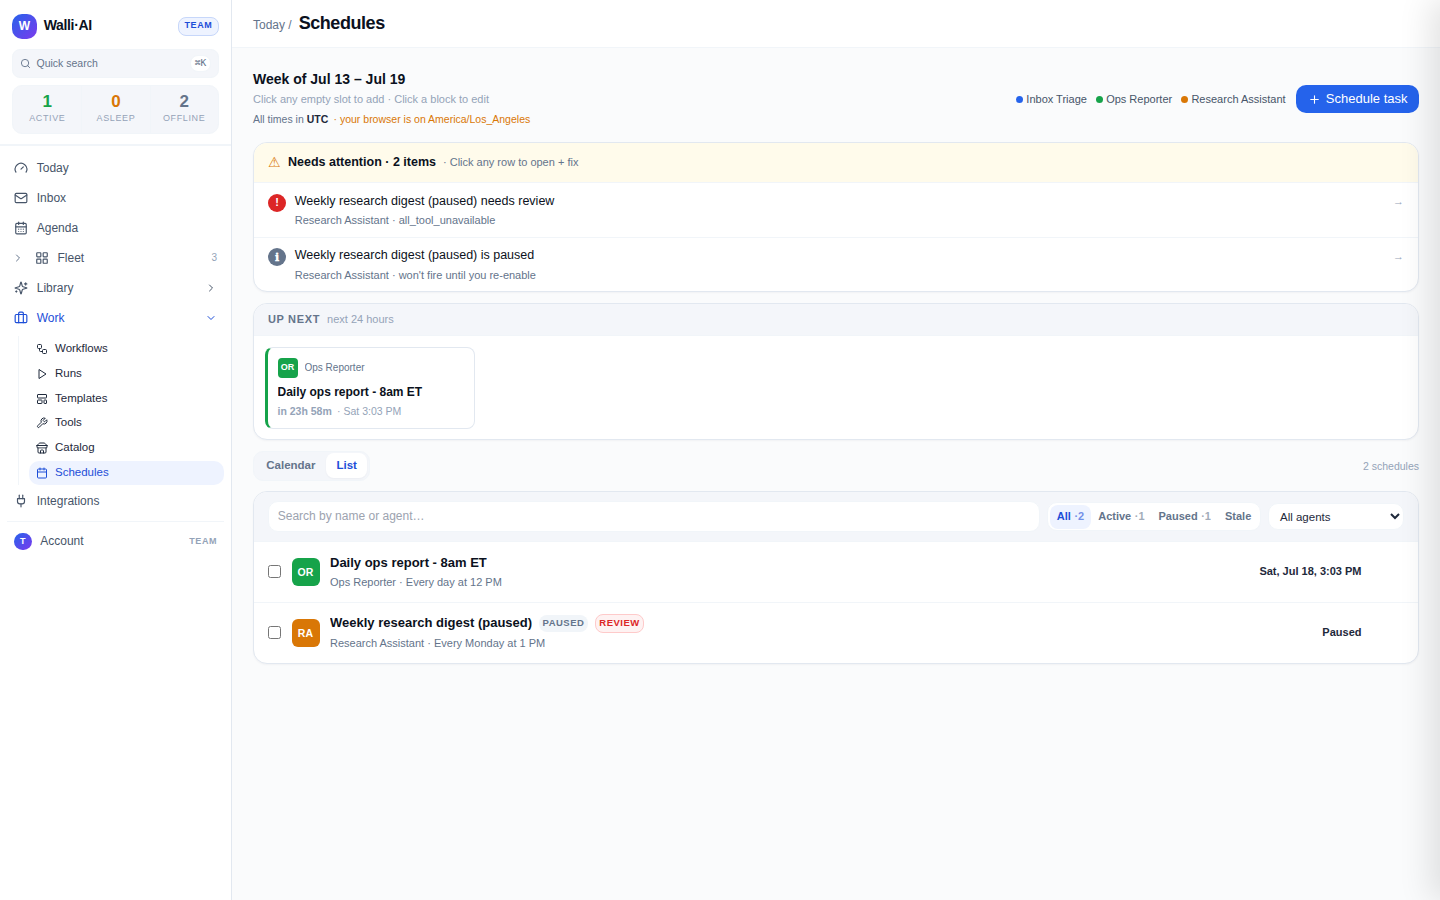
The List view is built for maintenance: search by name or agent, filter by All / Active / Paused / Stale, and sort by what fires next. Each row shows the agent, the cadence in plain English, the next run time, and a dot for the last run's outcome. A Review badge (with a tooltip explaining why) or an {n}x failed badge tells you which schedules need a look; see Recovering from a failed run for what to do next.
Tips
- Use the Next 10 firings preview to sanity-check a cron before you save, especially for weekday-only or multi-hour cadences.
- Stagger schedules that report to you so their approvals and deliverables do not all land in the same minute; the Needs attention panel flags same-agent overlaps for you.
- Pausing is fully reversible and the right lever when an agent is noisy; delete only when you are sure you will not need the cadence again.
- Attach a schedule to a workflow that already has a Suggested schedule and the dialog pre-picks that cadence for you.