Hire your first agent
Create an agent, pick its role and model, and get your first result.
Hiring an agent is the first thing you do in Walli-AI, and it takes about a minute. You describe the role in plain language, the platform matches it to a persona and starter workflows, you pick a model, and you launch. This guide walks the whole wizard end to end and then gets you to your first result in chat. You do most of this on the Fleet page at /agents.
What you can do
- Describe your role in a sentence and let Walli-AI pick the right persona, skills, and starter workflows.
- Or browse the catalog of occupations manually and choose one.
- Set the agent's name, purpose, AI provider, and model.
- Turn on curated starter workflows that begin saving time on a schedule immediately.
- Launch the agent and start your first conversation.
Open the Fleet page
Go to Fleet (/agents) in the sidebar. If you have no agents yet, you will see an empty state titled Your fleet is empty with a Hire your first agent button. If you already have agents, they appear as cards and you click Hire agent (top right) or the dashed Hire a new agent tile.
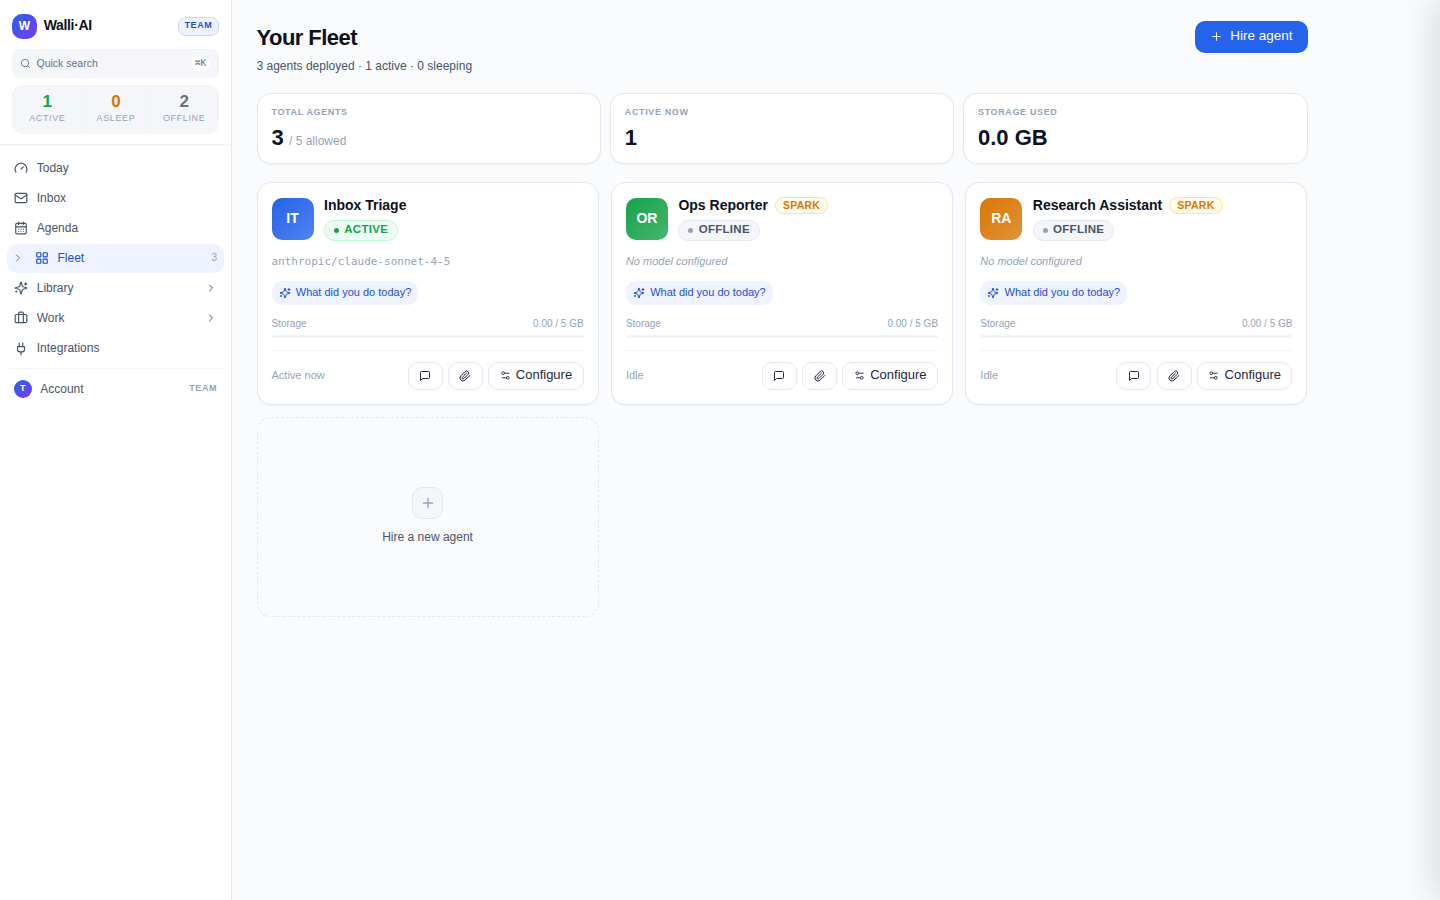
If you have reached your plan's agent limit, the hire button routes you to Billing instead. See your plan's agent count on the Billing page.
Walk the setup wizard
The wizard opens at /agents/new/setup with a row of step pills: Persona, Use Case, Purpose, Provider, API Key & Model, and Confirm. A progress line reads "Step N of 6." You can move quickly by describing your role, or step through each screen.
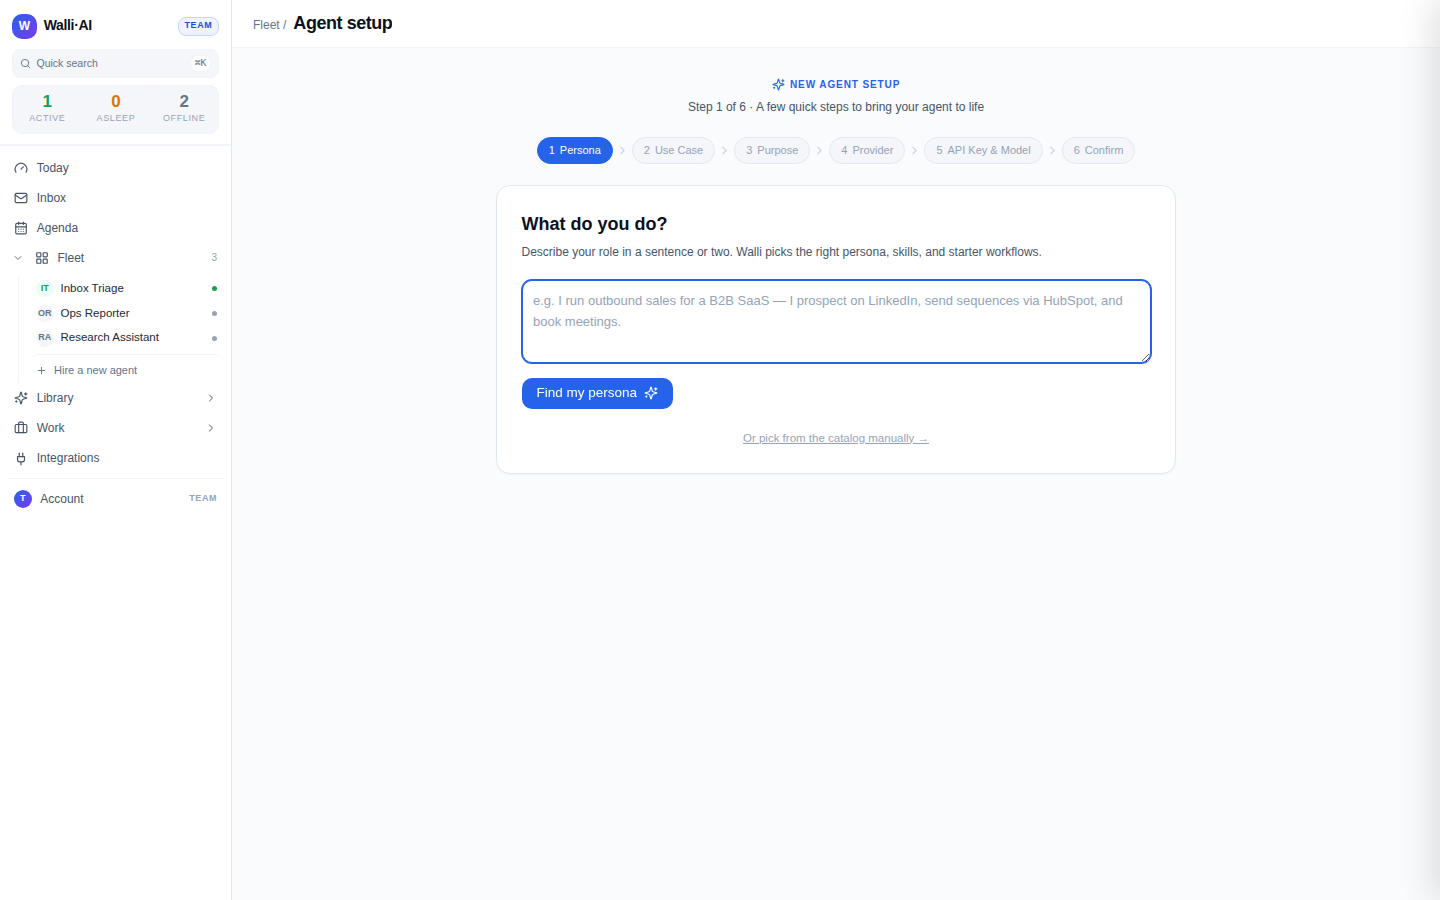
- Persona (Fast Track). Under What do you do?, describe your role in a sentence or two, for example "I run outbound sales for a B2B SaaS." Click Find my persona. Walli-AI returns matching personas with a confidence score and a suggested name; pick one and the wizard jumps ahead with a use case already selected. Prefer to choose yourself? Click Or pick from the catalog manually.
- Use Case. Choose a pre-built persona that shapes how the agent thinks and communicates. Filter by category (Sales, Support, Marketing, Operations, HR, Engineering, Real Estate) or describe your role to match. This step is optional: you can Skip for now.
- Purpose. Under What will this agent help you with?, type a purpose, or tap a Quick suggestion such as "Help me manage my inbox and draft replies" or "Analyze data and create reports." This shapes the agent's personality and focus. Also skippable.
- Provider. Choose your AI provider. Walli-AI Spark (shown in the picker as
Walli Spark) is included with every plan and needs no API key. You can also bring your own key for Anthropic, OpenAI, Google, Mistral AI, Grok (xAI), Groq, or Together AI. Click Continue. - API Key & Model.
- With Walli-AI Spark, pick a model from the Spark catalog. Each card shows the context window, capability chips, and the model's price per 1M input and output tokens (every model burns AI Units at its own AWS-billed price). No key required.
- With your own provider, paste your API key (it is encrypted at rest and never returned after saving), click Fetch available models, and select one from the live list.
- Confirm. Review the summary: agent name, use case, purpose, provider, and model. If the occupation ships starter workflows, a Starter workflows picker lets you turn on curated automations, each of which runs on a schedule and starts saving time immediately. Uncheck any you would rather skip. Click Launch.
To finish, a model must be selected; if you brought your own key, a fetched model is also required. Name, use case, and purpose can all be skipped.
Meet your agent
After you launch, a done screen confirms the agent is ready and shows its purpose, provider, and model. It offers two paths:
- Start your first conversation opens chat at
/chat/<id>with your new agent. - Go to agents list instead returns you to the Fleet.
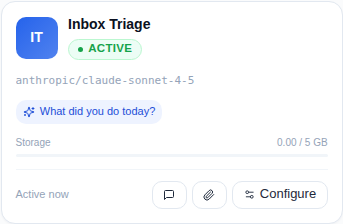
Back on the Fleet page, your agent appears as a card with its name, a Spark badge if it runs on Spark, its model, storage usage, and a live status such as Active now or Sleeping. From the card you can open chat, view its files, or click Configure to change its setup later.
Get your first result
Open the agent in chat and give it a concrete job: "Summarize these three links," "Draft a reply to this email," or "Build a table of my current deals." The agent works and returns a structured result you can read, refine, or save. For the anatomy of a chat, replies, deliverables, and attachments, see Chatting with an agent.
If you turned on starter workflows during setup, those run on their schedule without any further action, and their output shows up on Today and in the Library the next time they fire.
Tips
- The fastest setup is Fast Track: describe your role, accept the match, and launch. You can refine the persona and model later from Configure.
- You are not locked into your model choice. Switch between Spark and your own key any time from the agent's provider settings. See Changing an agent's AI model or provider.
- Give a new agent one clear job first rather than a vague mandate. It is easier to see the value, and the agent's memory builds from there.
Turning on a starter workflow at the Confirm step is the quickest way to see Walli-AI's scheduled work in action. Check Today the next morning to see what it produced.